Theoretical Paper
- Computer Organization
- Data Structure
- Digital Electronics
- Object Oriented Programming
- Discrete Mathematics
- Graph Theory
- Operating Systems
- Software Engineering
- Computer Graphics
- Database Management System
- Operation Research
- Computer Networking
- Image Processing
- Internet Technologies
- Micro Processor
- E-Commerce & ERP
Practical Paper
Industrial Training
Android - Push Notification
A notification is a message you can display to the user outside of your application's normal UI. You can create your own notifications in android very easily.
Android provides NotificationManager class for this purpose. In order to use this class, you need to instantiate an object of this class by requesting the android system through getSystemService() method. Its syntax is given below −
NotificationManager NM;
NM=(NotificationManager)getSystemService(Context.NOTIFICATION_SERVICE);
After that you will create Notification through Notification class and specify its attributes such as icon,title and time e.t.c. Its syntax is given below −
Notification notify = new Notification(android.R.drawable.stat_notify_more,title,System.currentTimeMillis());
The next thing you need to do is to create a PendingIntent by passing context and intent as a parameter. By giving a PendingIntent to another application, you are granting it the right to perform the operation you have specified as if the other application was yourself.
PendingIntent pending = PendingIntent.getActivity(getApplicationContext(), 0, new Intent(),0);
The last thing you need to do is to call setLatestEventInfo method of the Notification class and pass the pending intent along with notification subject and body details. Its syntax is given below. And then finally call the notify method of the NotificationManager class.
notify.setLatestEventInfo(getApplicationContext(), subject, body,pending);
NM.notify(0, notify);
Apart from the notify method, there are other methods available in the NotificationManager class. They are listed below −
| Sr.No | Method & description |
| 1 | cancel(int id) |
| 2 | cancel(String tag, int id) |
| 3 | cancelAll() |
| 4 | notify(int id, Notification notification) |
| 5 | notify(String tag, int id, Notification notification) |
Example
The below example demonstrates the use of NotificationManager class. It crates a basic application that allows you to create a notification.
To experiment with this example, you need to run this on an actual device or in an emulator.
| Steps | Description |
| 1 | You will use Android studio to create an Android application under a packagecom.example.sairamkrishna.myapplication |
| 2 | Modify src/MainActivity.java file to add Notification code. |
| 3 | Modify layout XML file res/layout/activity_main.xml add any GUI component if required. |
| 4 | Run the application and choose a running android device and install the application on it and verify the results. |
Here is the content of MainActivity.java.
package com.example.sairamkrishna.myapplication;

import android.app.Notification;
import android.app.NotificationManager;

import android.content.Context;
import android.support.v7.app.ActionBarActivity;
import android.os.Bundle;
import android.view.View;

import android.widget.Button;
import android.widget.EditText;

public class MainActivity extends ActionBarActivity {
   EditText ed1,ed2,ed3;
   protected void onCreate(Bundle savedInstanceState) {
      super.onCreate(savedInstanceState);
      setContentView(R.layout.activity_main);

      ed1=(EditText)findViewById(R.id.editText);
      ed2=(EditText)findViewById(R.id.editText2);
      ed3=(EditText)findViewById(R.id.editText3);
      Button b1=(Button)findViewById(R.id.button);

      b1.setOnClickListener(new View.OnClickListener() {
         @Override
         public void onClick(View v) {
            String tittle=ed1.getText().toString().trim();
            String subject=ed2.getText().toString().trim();
            String body=ed3.getText().toString().trim();

            NotificationManager notif=(NotificationManager)getSystemService(Context.NOTIFICATION_SERVICE);
            Notification notify=new Notification.Builder
               (getApplicationContext()).setContentTitle(tittle).setContentText(body).
               setContentTitle(subject).setSmallIcon(R.drawable.abc).build();

               notify.flags |= Notification.FLAG_AUTO_CANCEL;
               notif.notify(0, notify);
         }
      });
   }
}
Here is the content of activity_main.xml
< ?xml version="1.0" encoding="utf-8"?>
< RelativeLayout xmlns:android="http://schemas.android.com/apk/res/android"
   xmlns:tools="http://schemas.android.com/tools" android:layout_width="match_parent"
   android:layout_height="match_parent" android:paddingLeft="@dimen/activity_horizontal_margin"
   android:paddingRight="@dimen/activity_horizontal_margin"
   android:paddingTop="@dimen/activity_vertical_margin"
   android:paddingBottom="@dimen/activity_vertical_margin" tools:context=".MainActivity">

   < TextView
      android:layout_width="wrap_content"
      android:layout_height="wrap_content"
      android:text="Notification"
      android:id="@+id/textView"
      android:layout_alignParentTop="true"
      android:layout_centerHorizontal="true"
      android:textSize="30dp" />
      .
   < TextView
      android:layout_width="wrap_content"
      android:layout_height="wrap_content"
      android:text="Mca tutorials"
      android:id="@+id/textView2"
      android:layout_below="@+id/textView"
      android:layout_centerHorizontal="true"
      android:textSize="35dp"
      android:textColor="#ff16ff01" />

   < EditText
      android:layout_width="wrap_content"
      android:layout_height="wrap_content"
      android:id="@+id/editText"
      android:layout_below="@+id/textView2"
      android:layout_alignLeft="@+id/textView2"
      android:layout_alignStart="@+id/textView2"
      android:layout_marginTop="52dp"
      android:layout_alignRight="@+id/textView2"
      android:layout_alignEnd="@+id/textView2"
      android:hint="Name" />

   < EditText
      android:layout_width="wrap_content"
      android:layout_height="wrap_content"
      android:id="@+id/editText2"
      android:hint="Subject"
      android:layout_below="@+id/editText"
      android:layout_alignLeft="@+id/editText"
      android:layout_alignStart="@+id/editText"
      android:layout_alignRight="@+id/editText"
      android:layout_alignEnd="@+id/editText" />

   < EditText
      android:layout_width="wrap_content"
      android:layout_height="wrap_content"
      android:inputType="textPersonName"
      android:ems="10"
      android:id="@+id/editText3"
      android:hint="Body"
      android:layout_below="@+id/editText2"
      android:layout_alignLeft="@+id/editText2"
      android:layout_alignStart="@+id/editText2"
      android:layout_alignRight="@+id/editText2"
      android:layout_alignEnd="@+id/editText2" />

   < Button
      android:layout_width="wrap_content"
      android:layout_height="wrap_content"
      android:text="Notification"
      android:id="@+id/button"
      android:layout_marginTop="77dp"
      android:layout_below="@+id/editText3"
      android:layout_alignRight="@+id/textView"
      android:layout_alignEnd="@+id/textView" />

< /RelativeLayout>
Here is the content of AndroidManifest.xml.
< ?xml version="1.0" encoding="utf-8"?>
< manifest xmlns:android="http://schemas.android.com/apk/res/android"
   package="com.example.sairamkrishna.myapplication" >

   < application
      android:allowBackup="true"
      android:icon="@mipmap/ic_launcher"
      android:label="@string/app_name"
      android:theme="@style/AppTheme" >

      < activity
         android:name=".MainActivity"
         android:label="@string/app_name" >

         < intent-filter>
            < action android:name="android.intent.action.MAIN" />
            < category android:name="android.intent.category.LAUNCHER" />
         < /intent-filter>

      < /activity>

   < /application>
< /manifest>
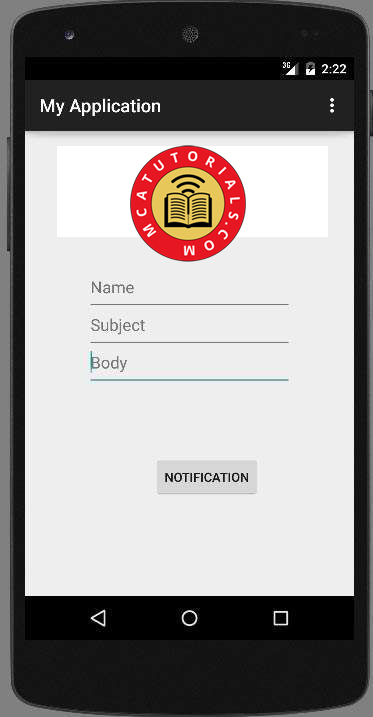
Let's try to run our application. To run the app from Android studio, open one of your project's activity files and click Run  icon from the tool bar. Before starting your application, Android studio will display following window to select an option where you want to run your Android application.

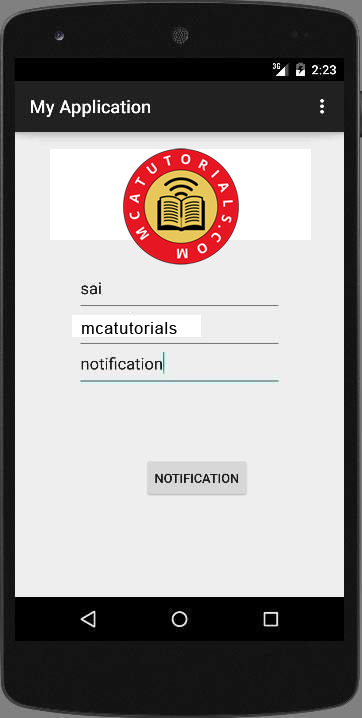
Now fill in the field with the title , subject and the body. This has been shown below in the figure −

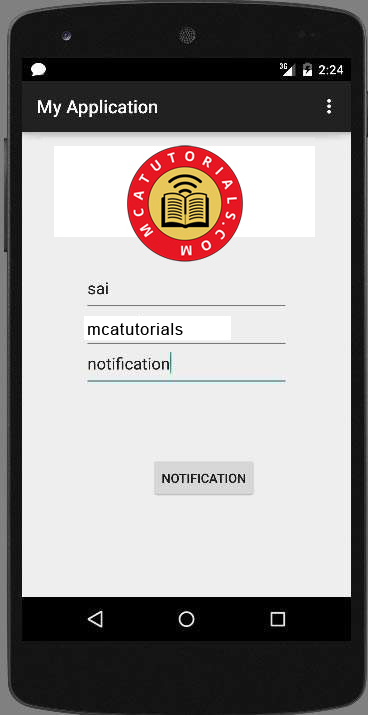
Now click on the notify button and you will see a notification in the top notification bar. It has been shown below −

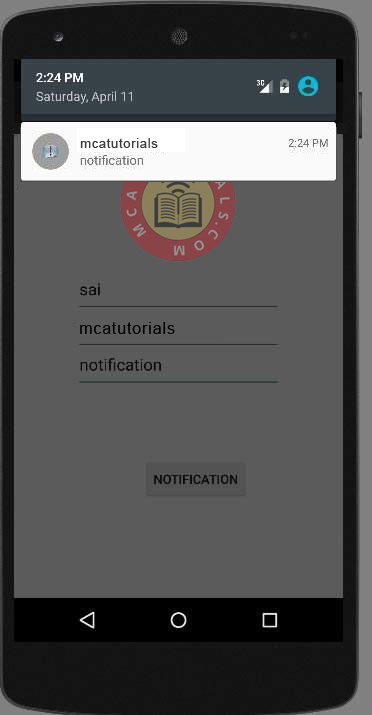
Now scroll down the notification bar and see the notification. This has been shown below in the figure −


